How to make a wedding QR code for photos
To make a wedding QR code for photos, create a shared album and download its QR code from the album home page. Add the code to signs or table cards with a clear invitation to upload, then test a printed copy with a phone. Guests scan it to open the album and add photos without an app.
- Create your wedding album and download its QR code.
- Add the code and a short upload instruction to signs.
- Print a test and scan it before the wedding.



Smiles as big as our love! 💕
Viola
On this page
A wedding QR code for photos only helps if guests notice it, understand it and can scan it in dim reception light. Creating the code takes minutes; getting a full album takes a little planning on placement, wording and printing. This guide covers each step, with sign wording you can copy and a checklist to test before you print.
Step 1: create the album the code will open
A QR code is only a shortcut to a web address, so start with the place the photos will go. Create a shared wedding album, give it your names and date, and choose a style that matches your stationery. Download its QR code from the album home page and test that it opens the album.
The code points at your album’s link, so it keeps working for as long as the album is active; if you extend the album, the same code keeps working. After that, choose optional settings such as guest visibility, upload approval, videos and written wishes.
Step 2: place the code where guests pause
Think about the moments guests reach for their phones: cocktail hour, between courses, waiting at the bar and on the dance floor. Place a code in each of those spots rather than one large sign at the entrance.
- Table cards or place settings, one per table
- The welcome sign and the seating chart
- The bar, the photo booth and the guest book table
- The order of service or programme
- Invitations, the wedding website and thank-you cards
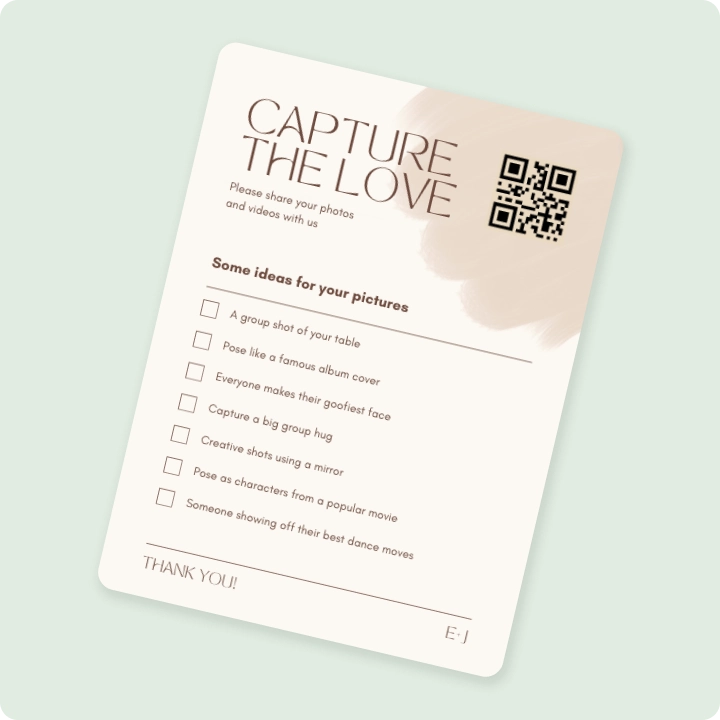
Step 3: write a clear upload instruction
A good sign has a clear action, a reason and a reassurance. Pick a line that fits your style and add “No app needed” underneath, because the fear of installing something is the most common reason guests don’t scan.
- “Scan to share your photos of our day”
- “We can’t be everywhere. Show us what we missed!”
- “Snap it, scan it, share it with the newlyweds”
- “Help us see the day through your eyes: scan to add your photos and videos”
Add the link as a fallback
Print the short album link in small text under the code. A few guests will have phones whose camera app doesn’t scan QR codes, and they can type the link instead.
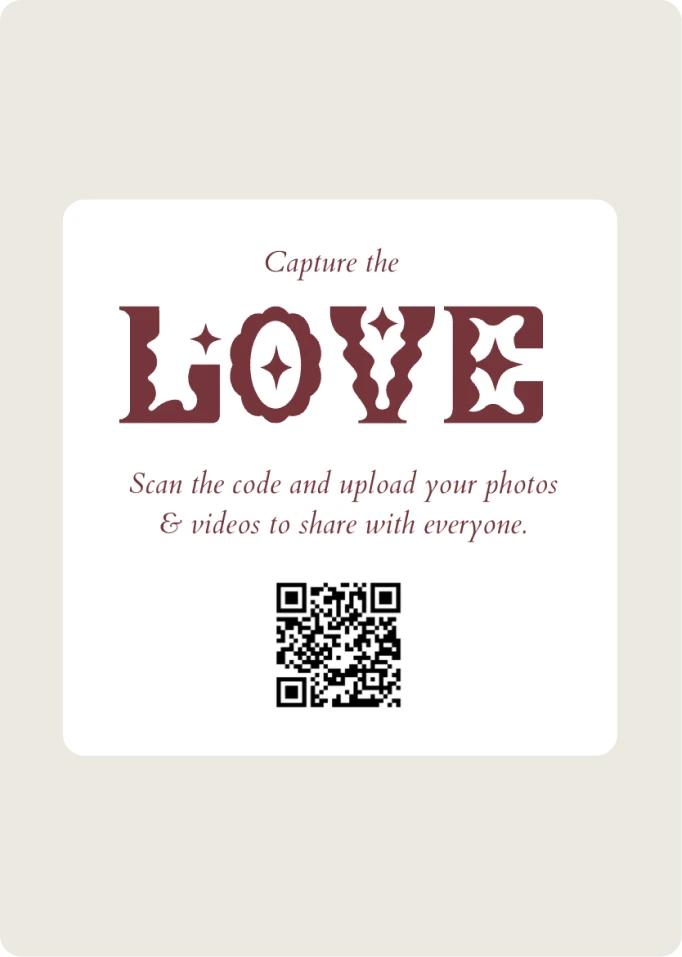
Step 4: print it so it scans every time
Most scanning problems come from printing, not from the code itself. Follow these rules and test before you order the full batch.
Print one test card at home first, then scan it from a seat at the table rather than holding it close. Try at least two different phones, one iPhone and one Android if you can, and try once with the lights dimmed. If it scans reliably, it will work for your guests.
- Print the code at least 3 cm (about 1.2 in) wide on table cards, larger on signs read from a distance
- Use strong contrast: a dark code on a light background
- Leave a clear margin of white space around the code
- Avoid glossy finishes that reflect candlelight and fairy lights
- Don’t place the code over a busy pattern or photo
Step 5: remind guests on the day
Even the best sign works better with one spoken reminder. Ask your host or DJ to mention the album after dinner or before the first dance, and point to the cards on the tables. If the photo wall is running, mention that too: guests love seeing their photos appear on the screen.
Step 6: use the code again after the wedding
Uploads often pick up again once guests are home. Put the QR code or link on your thank-you cards with a short note asking for any photos still sitting in camera rolls. A small sticker with the code inside each card works just as well as a printed insert.
When the album is complete, download it as a ZIP and share your favourites with the people who took them.
Wording for invitations and thank-you cards
The QR code does more work when it appears more than once. On invitations it lets guests share engagement photos and travel snaps; on thank-you cards it brings in the photos still sitting in camera rolls.
- Invitation insert: “Help us capture our day. Scan to share your photos and videos, before, during and after the wedding.”
- Wedding website: “Our shared album is open. Add any photos of us, from the proposal to the dance floor.”
- Thank-you card: “Thank you for being part of our day! Scan to add any photos we haven’t seen yet.”
Keep the wording consistent across everything you print, so guests recognise the code when they see it again at the reception.
Can you use a free QR code generator instead?
You can turn any link into a QR code, including a link to a folder in a cloud photo service. The code itself is the easy part; what matters is where it leads. Check whether guests can upload without signing in, whether they can add videos, and whether you can control who sees what. A shared wedding album gives guests one place to upload from any phone, with no account.
Final checklist before you print
- The code opens your album, not a draft or a different link
- The sign says what to do and that no app is needed
- The short link is printed under the code
- Test card scanned from a seat, with two phones, in dim light
- Enough cards for every table, the bar and the photo booth
More guides
All guides
How to collect every photo from your wedding guests
A simple plan for before, during and after the wedding, so guest photos end up in one album.
5 min read
Digital guest book vs paper guest book
What a digital wedding guest book adds, prompts that get warmer messages and how to keep them.
4 min read
How to share event photos with a QR code
Before, during and after: the decisions that make a QR code photo album actually fill up.
5 min read